

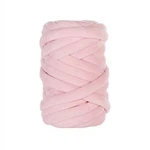


Acrylic Blend Yarn
Acrylic blend yarn is a popular knitting material among knitters and crocheters. It is a versatile yarn that is perfect for creating different types of knitwear, including sweaters, cardigans, scarves, blankets, and more. In this article, we will explain how to knit a sweater using acrylic blend yarn.
Before we get started on the knitting process, it is essential to understand what acrylic blend yarn is and its features. Acrylic yarn is made from a synthetic fiber that is derived from plastic, making it easy to clean and light in weight. It is also affordable compared to other types of yarn, making it perfect for beginners or those on a tight budget. Acrylic blend yarn, on the other hand, is made by blending acrylic fiber with another type of yarn, such as wool, polyester, or nylon. This combination creates a unique texture that is soft and durable.
When selecting a pattern for your sweater, make sure to choose one that is suitable for the acrylic blend yarn you have. Some patterns may require a specific type of yarn, so it is essential to read through the instructions before starting. Once you have your pattern, it is time to start knitting.
Step 1: Cast on Stitches
The first step in knitting a sweater is to cast on the required number of stitches for the size you are making. You can use any cast-on method you prefer, such as the long-tail cast-on or the cable cast-on. Make sure to count your stitches carefully to ensure that you have the right number.
Step 2: Knit the Ribbing
The ribbing is usually the first part of a sweater and is used to create the cuffs, hem, and collar. You will need to knit the ribbing using a smaller needle size than the rest of the sweater to create a tight, stretchy pattern. Most sweaters use a 2x2 ribbing, which means you knit two stitches, then purl two stitches, and repeat this pattern until you reach the desired length for your ribbing.
Step 3: Knit the Body
Once you have completed the ribbing, it is time to move on to the body of the sweater. You will need to knit in stockinette stitch, which means you knit one row and purl the next row. You will continue this pattern until you reach the desired length for your sweater.
Step 4: Shape the Armholes
The next step is to shape the armholes. Most sweater patterns will give you directions on how to do this. It usually involves decreasing stitches on both sides of the body to create a curve for the arms. Make sure to follow the directions carefully and count your stitches to ensure accuracy.
Step 5: Knit the Sleeves
Once you have shaped the armholes, you can move on to knitting the sleeves. You will need to cast on the required number of stitches and knit in stockinette stitch until you reach the length required for your sleeves. You will then need to shape the sleeves by decreasing stitches on both sides to create a tapered effect. Finally, you will need to sew the sleeves onto the body of the sweater using a tapestry needle.
Step 6: Knit the Neckline
The last step is to knit the neckline. You will need to pick up stitches around the collar and knit in stockinette stitch until you reach the desired length for your neckline. You can add a ribbed collar or a cowl neck, depending on your preference.
In conclusion, knitting a sweater using acrylic blend yarn is a fun and easy project that can be completed by knitters of all levels. With the right pattern and a bit of patience, you can create a beautiful and comfortable sweater that will keep you cozy all winter long. Try it out, and you might find a new hobby that you love.
Hot Tags: acrylic blend yarn, China, suppliers, manufacturers, factory, custom, wholesale, for sale, price list, Lightweight soft acrylic yarn for blankets, Baby Sport Big Ball Yarn, Good Quality 100 Acrylic Yarn, colorful acrylic chunky yarn for arm knitting, acrylic blend yarn, Giant Washable Polyester Big Yarn for Hand Knitting
You Might Also Like


Send Inquiry